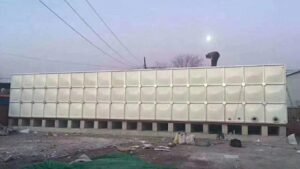
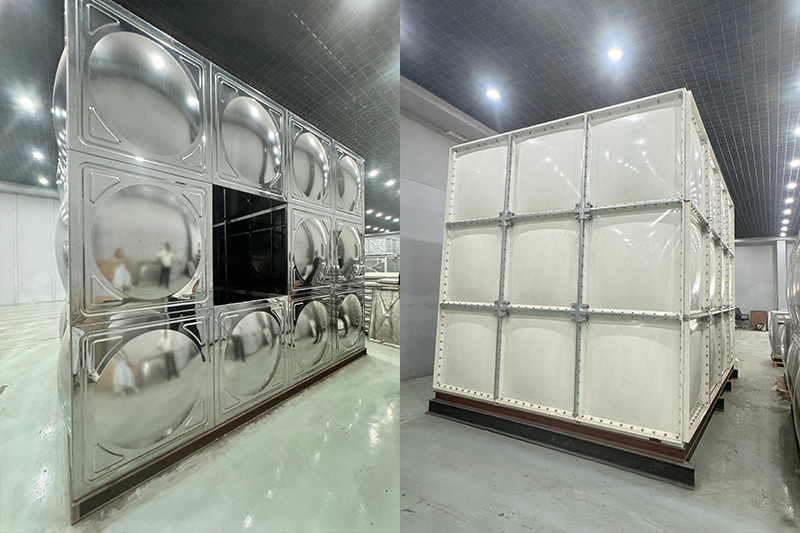
Sectional water tank installation is the reason modular tanks exist: a tank that cannot fit through a door is assembled from panels inside the room. But modularity only pays off if the assembly is done correctly — most leakage claims trace back to three avoidable errors on site. This guide sets out the full procedure, the clearance and support requirements, and the checks to run before you sign off.
Before Delivery: Three Things to Confirm
- Access route — measure every door, corridor, lift and stair the panels must pass. Panel sizes are standard (1 m × 1 m, 1 m × 0.5 m, 1 m × 2 m), so check that the largest panel fits with handling clearance.
- Base readiness — the slab or steel skid must be cured, level and load-rated for the filled tank weight. A full 100 m³ tank weighs about 100 tonnes plus the structure.
- Services — inlet, outlet, overflow, drain and vent positions confirmed against the drawing, with sufficient space for pipework and valves.
Foundation and Support Requirements
The base is the single most important element of a sectional installation.
- Level tolerance — typically within ±3 mm over the full footprint. Shim where necessary; never force panels onto an uneven base.
- Full bearing — the tank must bear uniformly. Concrete plinth, reinforced slab, or a galvanised steel channel base (skid) are the standard options.
- Drainage — provide a drain channel or gully around outdoor tanks so wash-down and overflow do not pond under the base.
- Load path — confirm slab capacity with the structural engineer before delivery, especially on rooftop or elevated plant rooms.
Clearance Requirements
Insufficient clearance is the most common reason an otherwise sound tank becomes unmaintainable. Plan for:
- 600 mm minimum around the tank for inspection, bolt access and future panel replacement
- 800–1000 mm on the manway side, so the cover can be removed and a person can enter
- 600 mm above the roof for roof panel removal, vent and level sensor access
- Overflow and vent discharge to a visible, safe location — never into a concealed void
Step-by-Step Installation Procedure
1. Set out and lay the base frame
Position the base channel or skid, check level in both directions, and anchor. Lay base panels from the centre outward, verifying alignment continuously.
2. Bed the gaskets
Lay food-grade EPDM or PVC gasket tape into the flange channels. Keep the tape continuous — every joint is a potential leak path. Do not substitute generic tape.
3. Erect wall panels
Work course by course from a corner. Fit bolts finger-tight first, then progressively tighten in a cross pattern once the course is aligned. Do not fully torque one bolt at a time.
4. Fit internal stays and tie rods
Install the specified bracing as each course completes. Stays carry the hydrostatic load; omitting or delaying them risks panel distortion during the first fill.
5. Fit the roof and access
Install the manway, roof panels, vent with insect screen, overflow and level gauge. Fit the internal ladder if specified.
6. Connect services
Support pipework independently — never hang pipe load off a tank nozzle. Fit flexible couplings at the tank connections to absorb movement.
7. Hydrostatic test
Fill in stages, inspecting joints at each level. Hold at full head, typically 24 hours, with zero leakage as the acceptance criterion. Re-torque bolts after the first fill and again at 12 months.
8. Clean, disinfect and commission
For potable tanks, drain, clean, disinfect to the applicable standard, flush, and take a water sample before putting the tank into service.
Common Installation Mistakes
- Uneven base — the leading cause of persistent joint leakage
- Over-torqued bolts — cracks flanges; use a torque wrench to the manufacturer’s figure
- Broken gasket continuity at corners — leaks almost always start at panel corners
- Missing stays — panels bulge under load
- Blocked vent — causes vacuum deformation when draining and contamination risk
- No clearance for maintenance — a tank boxed in on all sides cannot be inspected or repaired
Sectional Tank Installation Guidelines: Summary Checklist
- Access route surveyed and panel sizes confirmed
- Base level, cured, load-rated and verified
- Clearances met on all sides and above
- Gaskets continuous and to specification
- Bolts torqued progressively in cross pattern
- Internal stays fitted per drawing
- Pipework independently supported
- Hydrostatic test passed with records
- Cleaned, disinfected and water sampled
- O&M documentation and spare gasket set handed over
Project installs of this type — including hotel plant-room replacements where access is tight and downtime is limited — are routine for experienced GRP sectional tank installers. The difference between a smooth job and a problematic one is almost always the survey done before delivery.
Planning an installation? Send us your plant room dimensions, access route and required capacity and we will produce a panel layout, base drawing and installation method statement.